Whenever I buy binders, I like to get the kind with the little plastic pouch on the front- they tend to last longer for me. Also, I'm always looking for ways to make my school supplies prettier, so what better way than to make a personalized cover for each binder!?
These are examples of two covers that I've made.
I'm going to show you how I made the pink and green one.
You'll need 3 sheets of cardstock, 2 coordinating sheets of
scrapbooking paper, a pencil, scissors, glue, and a permanent marker.
First, glue the long sides of 2 sheets of cardstock together.
(You only need about 1/2 inch of overlap.)
Then, lay the cardstock on top of the binder and mark off where it will be cut.
Make the marks a little further in than the absolute edges,
because the pouch is slightly smaller than the actual binder.
Glue the paper that you want to be the background onto the cardstock.
(To be sure it's the right size, glue the whole sheet of paper and then cut off the extra.)
Use any software that allows you to edit text (Word, Photoshop, etc.) to type out your intials.
Make sure the letter that will be in the center (your last initial) is larger than the other two.
The font I used it called "Cutie Pop" and can be downloaded here.
If you're using photoshop or any other image editing software,
make sure your canvas size is proportional to a standard sheet of paper (8.5x11 inches),
so your letters print true to size.
Cut out the letters, and go over them with a permamnent marker,
to cover any edges or marks from cutting them.

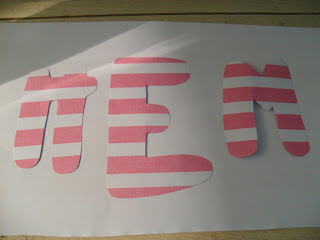
Turn each of the letters over on the back of the second sheet of scrapbooking paper,
and free hand an expanded outline of each letter.
They can be round or squared off, depending on the font you are using.
The outlines should look something like this when they are cut out.
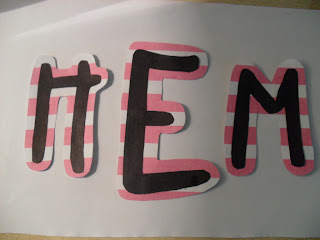
Glue the printed letters onto their outlines.
Finally, glue the letters onto the background, then slip in your binder and enjoy!


1 comment:
These are the cutest things ever!! Such a creative idea! I'll have to remember this post next time I need a binder cover!!
Post a Comment